Tuesday, October 31, 2017
Lemon-Sugar Hand Scrub.
I found these mini jars at Walmart and thought I can fix something for my "girls" for Halloween.
I came across this recipe that only used 3 ingredients: 3/4 cup sugar, 1/4 cup olive oil and 1TB lemon juice. It makes just enough to fill one of these little jars. They also get the boxes I posted before.
I hope everyone has a great Halloween, Renate
Saturday, October 28, 2017
Walking Dead Halloween Box with Shaker Lid.
I used my puzzle die for the background. Unfortunately the "cat" was taller than I thought, but I will leave it this way.
The shaker part I did like the last box.
I have a spiderweb die that I used on this side.
As background I used old book pages.
Here you can see the cat better.
For the splatters I used thinned out acrylic paint.
I think the bats name is Lucille.
Renate
Sunday, October 22, 2017
Mad Hatter Halloween Box with Shaker Lid.
I covered the box in old pages. Then I printed some "Mad Hatter Stuff" out.
I made the round quote with an epoxy sticker.
I sponged around the opening and added some UTEE to it.
For the shaker part I used a baseball card sleeve and adhered it with double-sided tape. This way you don't have to worry about the foam part, and the sequins still move freely. I used washi tape to close the opening of the sleeve.
The box is a 9x9 piece of card stock. You score it at 3 and 6 inches, turn it, and score again at 3 and 6 inches. When you cut the flaps in, you cut them in a "pinwheel pattern". This way, each side has a flap to make the box stronger.
For the lid you need a piece of 51/16 x 51/16 inch piece of card stock and score it at 1 inch on all 4 sides. On the lid you can glue the flaps down as usual.
Before I assemble the lid, I cut out the square and attach my sequins. Then I glue the flaps down.
Renate
Wednesday, October 18, 2017
Halloween Gable Box.
I got this gable box die at Michaels for 50% off.
I wanted the length to be 3 inches long, instead of 2 inches. So I just die-cut the gable box as usual and then cut the bottom flaps off and added a 6x4 piece of cardstock to it. I scored it where the scorelines where and left an inch for the bottom.
For the background I used wine corks, that I stamped randomly in the front and the one side.
For the cut-out I used some Vellum with alcohol inks on it.
For the cat, I colored it with a magic marker, followed by a glitter pen. After it dried I added about 3 layers of UTEE.
This side I stamped different Halloween words. Then I just splattered it with acrylic paint.
This was an easy project. I'm trying to see what else you can do with the gable die.
Renate
Tuesday, October 17, 2017
Triangle Halloween Shaker Box with Lid.
I found a tutorial at: frenchiestamps.com
For the shaker part I used a picture sleeve and filled it with sequins and just glued the edges to the inside. This way you don't have to use any foam on the edges.
The number 31 is called: 2-tier eclipse technique. I found the tutorial from Susan Campfield. On the circle I added a layer of UTEE
I used an embossing folder for the spiderweb and cut out 2 squares with Acetate on the back.
Behind these squares I put some Vellum.
I added some "filling" so it wouldn't reflect so bad.
It's not hard to do. I hope you give it a try. Renate
Thursday, October 12, 2017
Monday, October 2, 2017
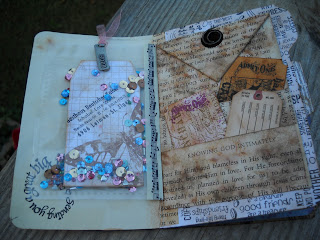
Mini 3 Tab File Folder Booklet.
I made the Page tabs with the Envelope Punch Board.
I found an old stamp, when my Mom ran a German restaurant back in the 70's.
I used vintage photo ink and splattered it with water then I used different stamps over it.
On the left side I covered the page with coffee dyed paper.
On the right I made a pocket insert with book pages.That is the first file folder.
I used vintage photo and walnut stain on the pocket.
This is the second file folder. You just glue the front to the back of the first one and so on.
I found some old negatives and punched out shapes and then just glued the top and bottom to the page, so you can insert cards like I did here. On the left you can see that I have a pocket when I joined the 2 file folders. On the right I just attached a little memo pad.
These are the items I had stuck on the left side.
This is the third file folder. Again I made a pocket, but cut it down more then the previous one. I also punched two holes with the word window punch in the same pocket.
On the right I glued a clear pocket.
Here's the card I made for the pocket'
Here's a close-up of the word windows.
I also made a shaker pocket.
The back has an old stamp that belonged to my Dad.
I just left the shaker pocket loose in the booklet, not attaching it to any page.
Here is a Halloween ticket I made.
.... and a Halloween tag, I found online.
It was fun to put together. Just a little something you can put in your purse.
Renate
Subscribe to:
Comments (Atom)


